Google Tag Manager is an awesome tool. It’s crazy powerful. I equate using GTM to having the Marauder’s Map in Harry Potter. You are given a entry way into a website and can influence all of the inner workings without given an actual key to the site. Technically, if you wanted to, you COULD (not saying you SHOULD), rewrite all of the code on the website with Javascript and change the whole dang thing.
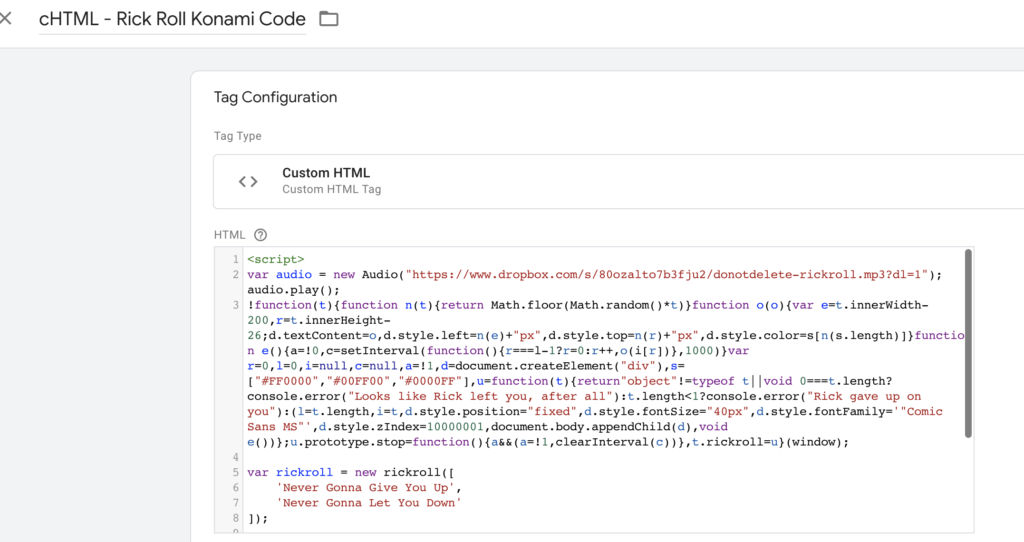
Seriously! Try it. Type 


 in your browser while on this site.
OMG Reload! RELOAD!
Sorry about that. But yes, I did that with Google Tag Manager. Amazing, right?
But what Is Google Tag Manager supposed to be used for (besides Rick Rolling your readers). It says it right in the name, Tag Management.
GTM, exists to help organize the pixels and third party tools on your website. But it does so much more. With GTM, you can set up an entire tracking architecture, and one of the tools you will be likely integrating is Google Analytics.
Setup Google Tag Manager
So what’s an ideal setup for GTM? Well, it really depends on what you are using it for? Some people just want to add Google Analytics to their site and if that is the goal, minimal setup is required. But what if you are looking to setup the infrastructure for a full tracking implementation. You’ll probably have call-to-action clicks, form submits, and scroll tracking as part of your KPI’s right? What’s the best way to setup Google Tag Manager to start building out this type of implementation?
Let’s start at the basics.
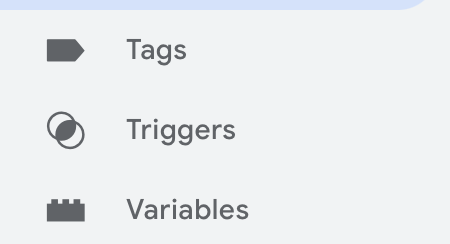
There are three types of GTM Components – Tags, Triggers, & Variables
It’s good to know the basics of what is in GTM before getting started with a configurations. We’ll review the three types of components below.
Tags
Tags are code. I like to refer to these in GTM “The What” It’s as simple as that. Generally, when you hear references to tags, most businesses are referring to third-party scripts that send information to platforms such as Google Analytics, Facebook, Twitter etc. These are generally why GTM is used. However, beyond the built in GTM integration tags, you can really code anything and add into a tag. I have built cookies, built custom events, and even manipulated the DOM (the webpage) with tags. An example of this would be if a dev team is busy and my customer wants to hide the phone number on the website in off hours, I can do that with GTM and not have to wait for the dev team. Tags is really just code. The thing with tags are, they don’t do much but sit there ideally unless you add a trigger. Which brings us to the next component.
Triggers
Triggers are “The When”. These are used to tell the system when a certain tag should be used. For instance, if you want to send data to Google Analytics when your main call-to-action button is clicked, you would use a trigger to specify when. The output would be something like:
When the click text “Alohomora” is the element clicked fire a Google Analytics Event that has “button_clicked” and the associated data.
Triggers power your tags and generally, every Tag has an associated trigger.
Variables
Variables store information that you can use and send along with tags. These are super handy. GTM provides some really great built-in variables, such as “Click Text” and “Page URL” which provides the text of the element that the user just clicked, and the page url that the user was on, respectively.
You can build your own custom variables if Google does not provide it already. This is where you can really release the true power of GTM and a measurement strategy. I’m not going to get into all of the different types of variables that you can build in this post but I’ll happily do a follow-up on it.
Getting Started with Google Tag Manager
All of these components exist in what is called “A Container”. A container is essentially your workspace to build your GTM into existence. When you first get started, you will be asked to create a new account. This is just a labeling system and has no bearing on really much of anything. You can think of this as just an easy way to keep all of the sites you own under the same roof.
You’ll then be asked to create a container. This should be a single website, app or server. For the sake of simplicity, we’ll focus on a Website container but there are more options depending on your setup. Server-side GTM will be another discussion topic soon.
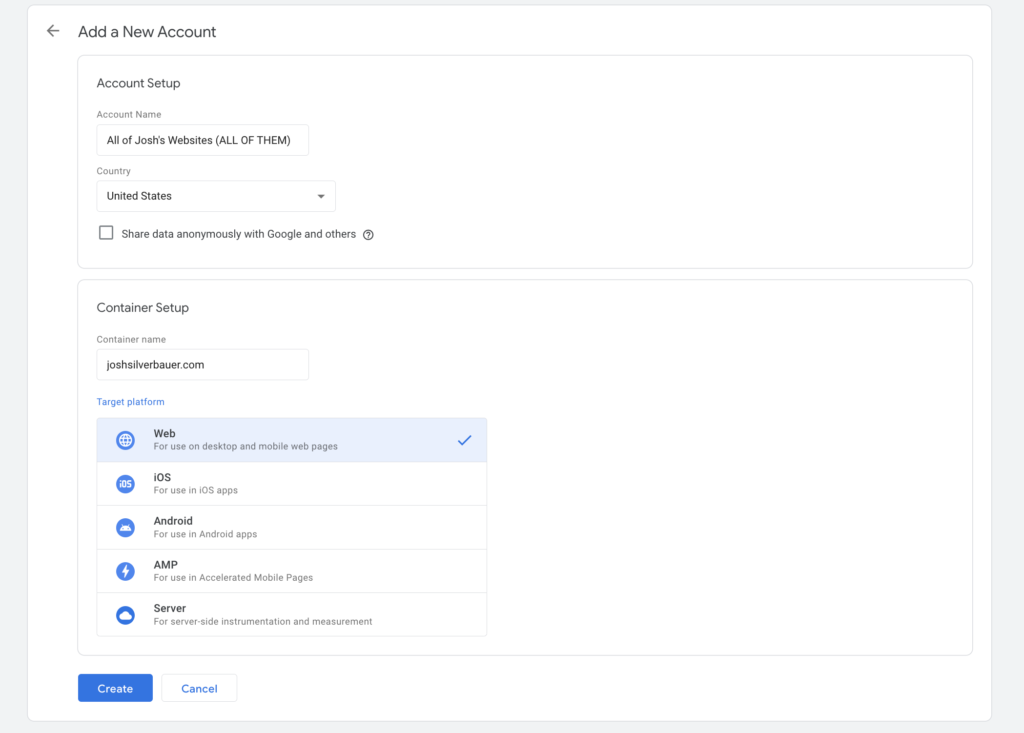
You’ll then be asked to sign your life away and give your first born to Google’s gnomes but as long as your cool with that, let’s move forward.
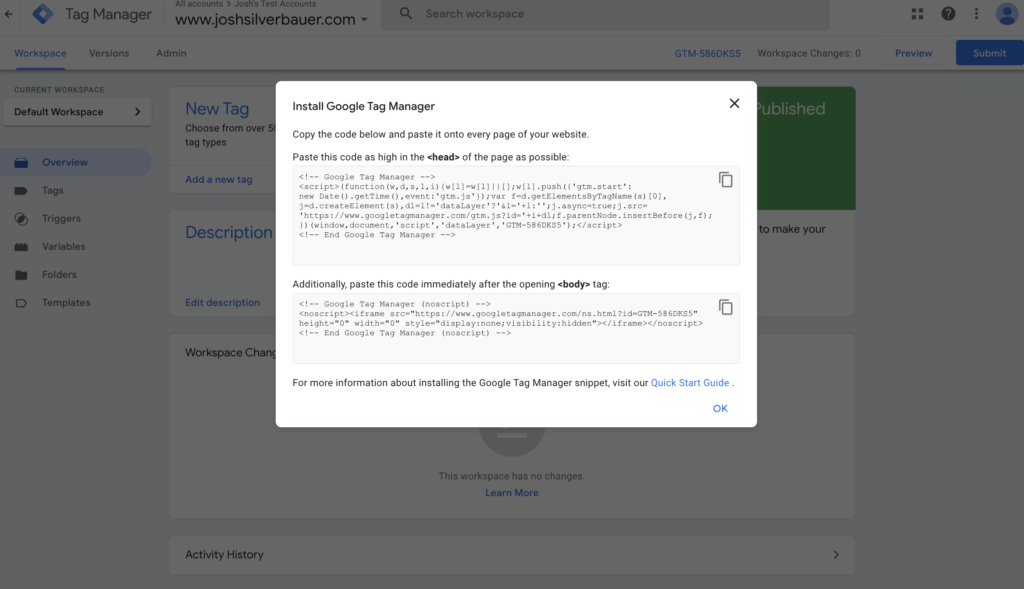
Implement the GTM Code
This is one of the rare occasions that to go into your website with the GTM setup. You may end up doing some complex things down the road like dataLayer implementation or setting up eCommerce, but if you’re not gonna get all fancy, then you really just need to do this next step and you can close your website forever and never return (I wouldn’t suggest this).
GTM will give you a line of code to implement on your site. You’ll need to navigate to theandon your website to implement this code.
On WordPress, I like to use a plugin called Header, Footer, Post Injector but there are a few different ways you can approach this. If you’re confused, reach out to your developer for help. Or just call your GenZ nephew. They’ll know what to do.
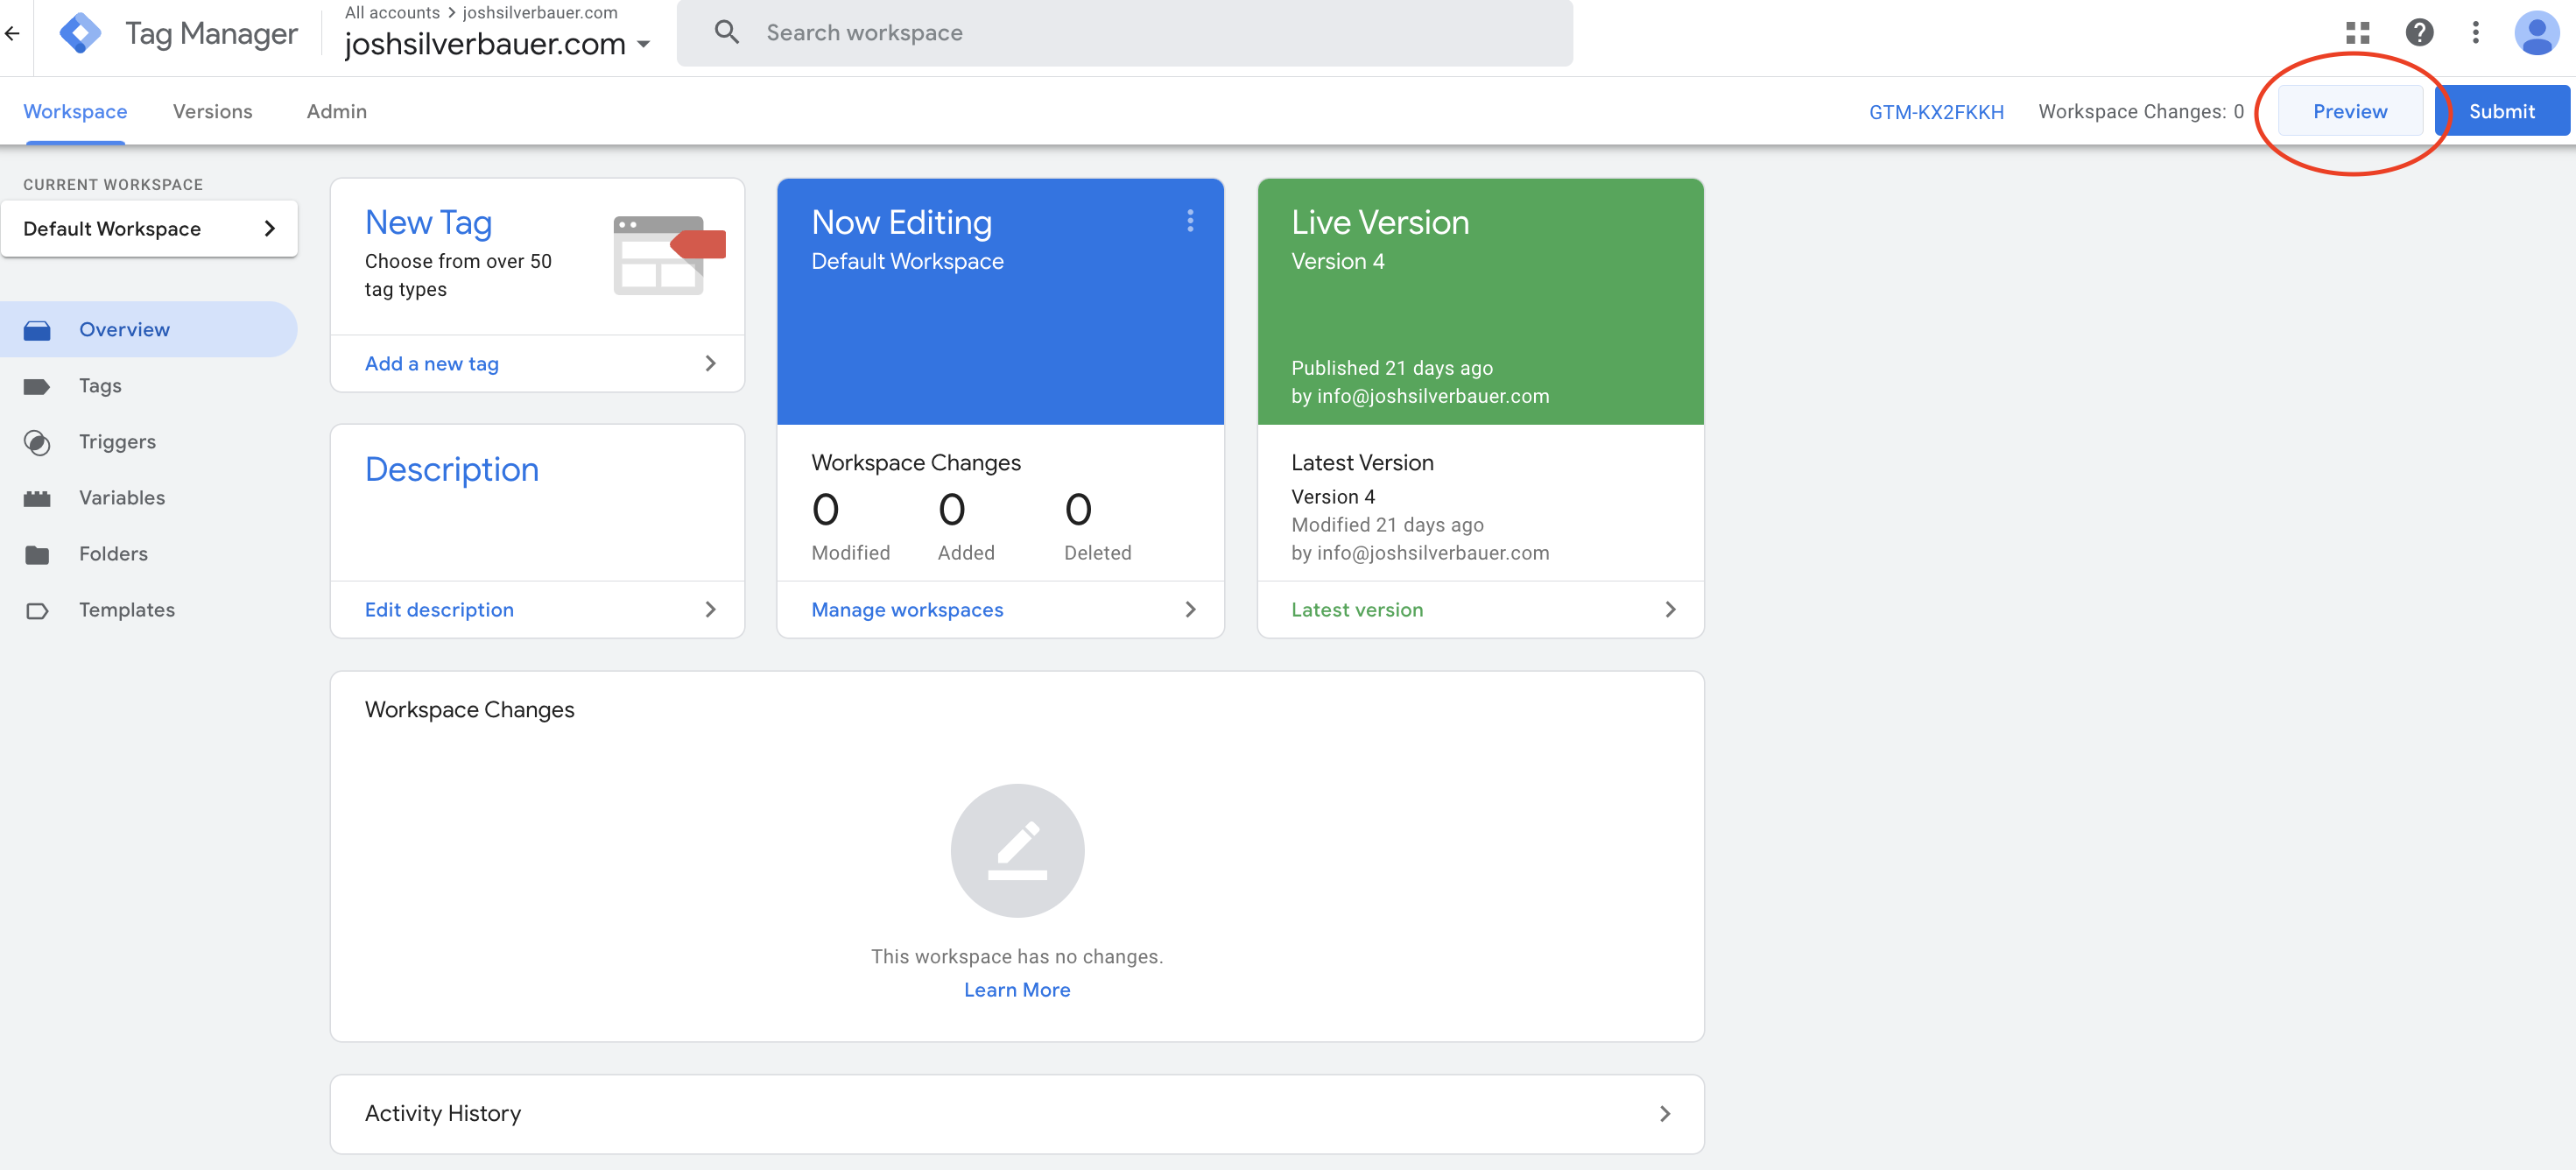
Create an Workspace to work in.
Once you setup the code. You can check that it’s working by using Google Tag Assistant (legacy)

You’ll see a green tag that says Google Tag Manager (blue is ok too but if you see red or yellow, something is wrong). You may need to publish the container first (though Google has fixed this in the previous year, so you should be ok)
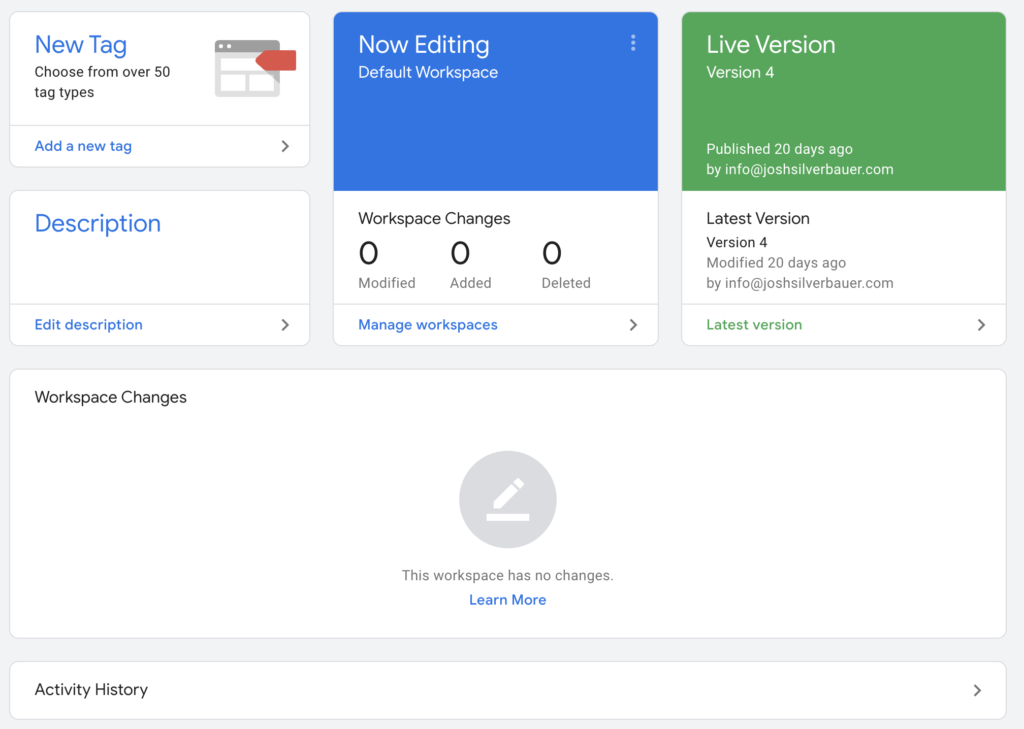
The next step you should do is create a new workspace. This isn’t 100% necessary but if multiple people are working within the same Google Tag Manager account, it helps you “not step on other people’s toes” and allows you to build in your own sandbox.
Step 1: Click on your current workspace (Default Workspace) and it will open a new section that looks like below:
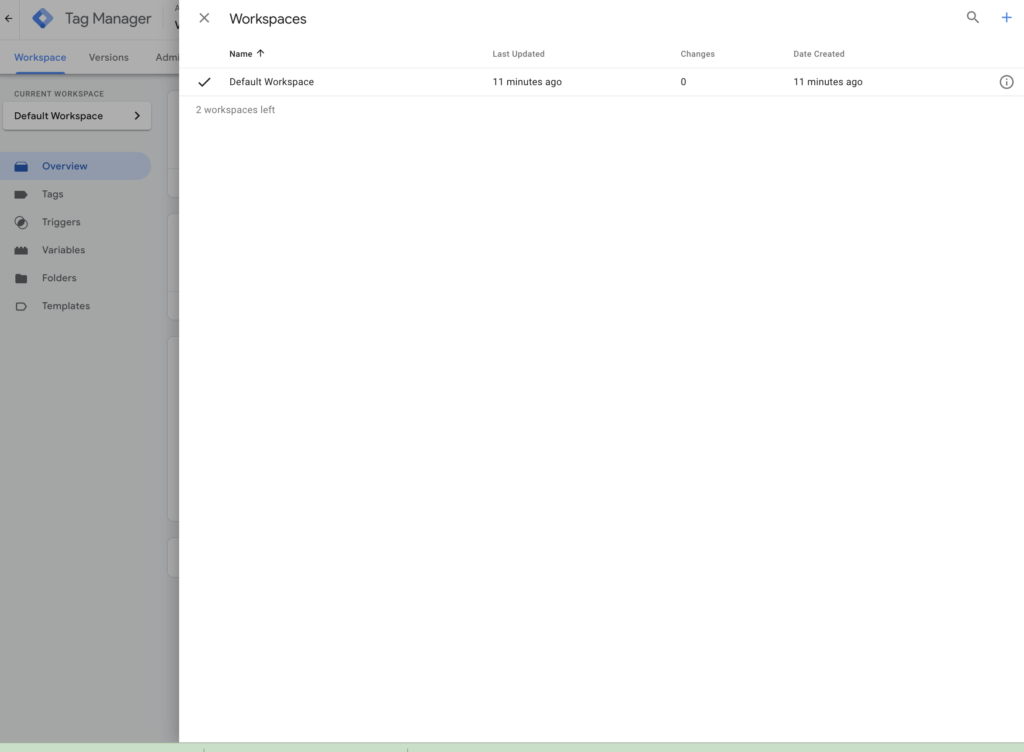
Once you reach this section, create a new workspace and label it something you’ll be able to identify (when you eventually publish the workspace, this will also be the version name.)
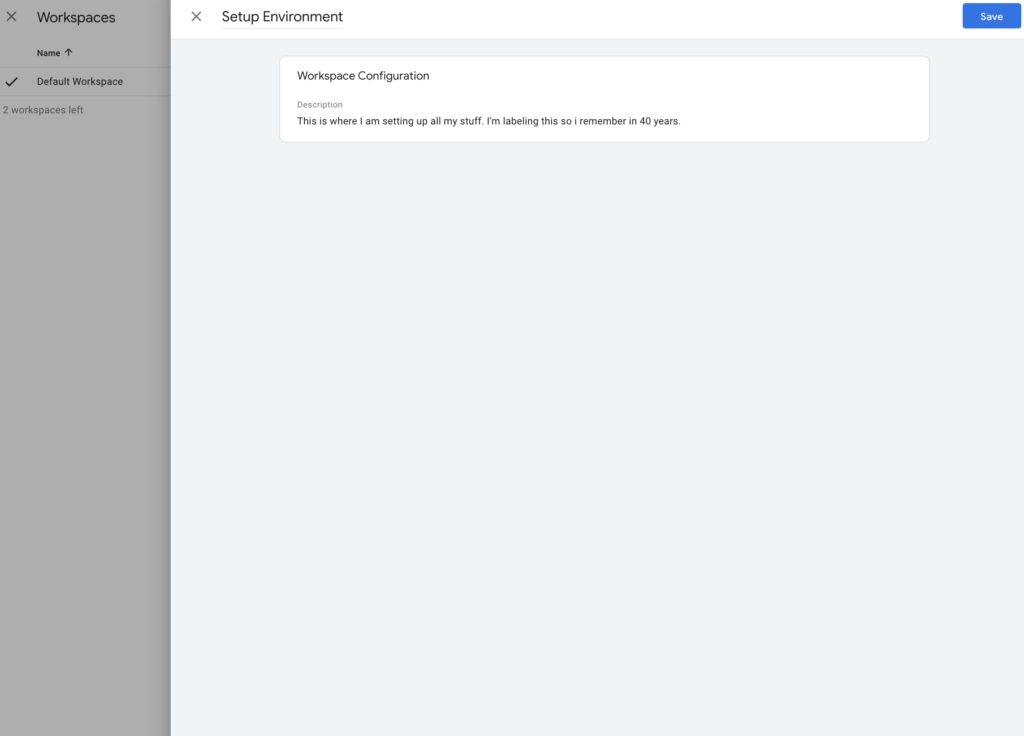
Click Save and you will now see you are in a new “Current Workspace”
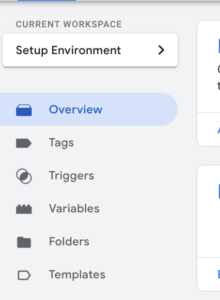
You are ready to begin setting up the container.
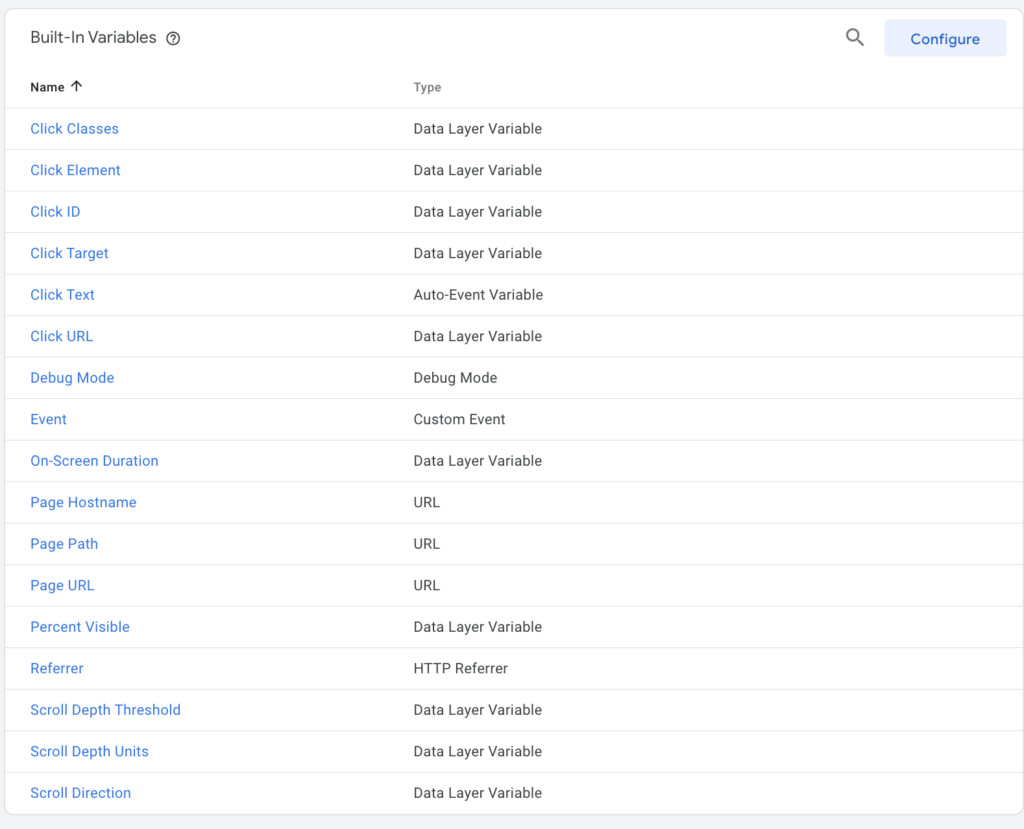
Enable Built-In Variables
Out of the box, the GTM variables that you are given are slim pickens. Google supplies you with 5 different variables that mostly just give you access to Page level data, which can be handy but what if you want to tag clicks or form submits. Not a lot of information here.
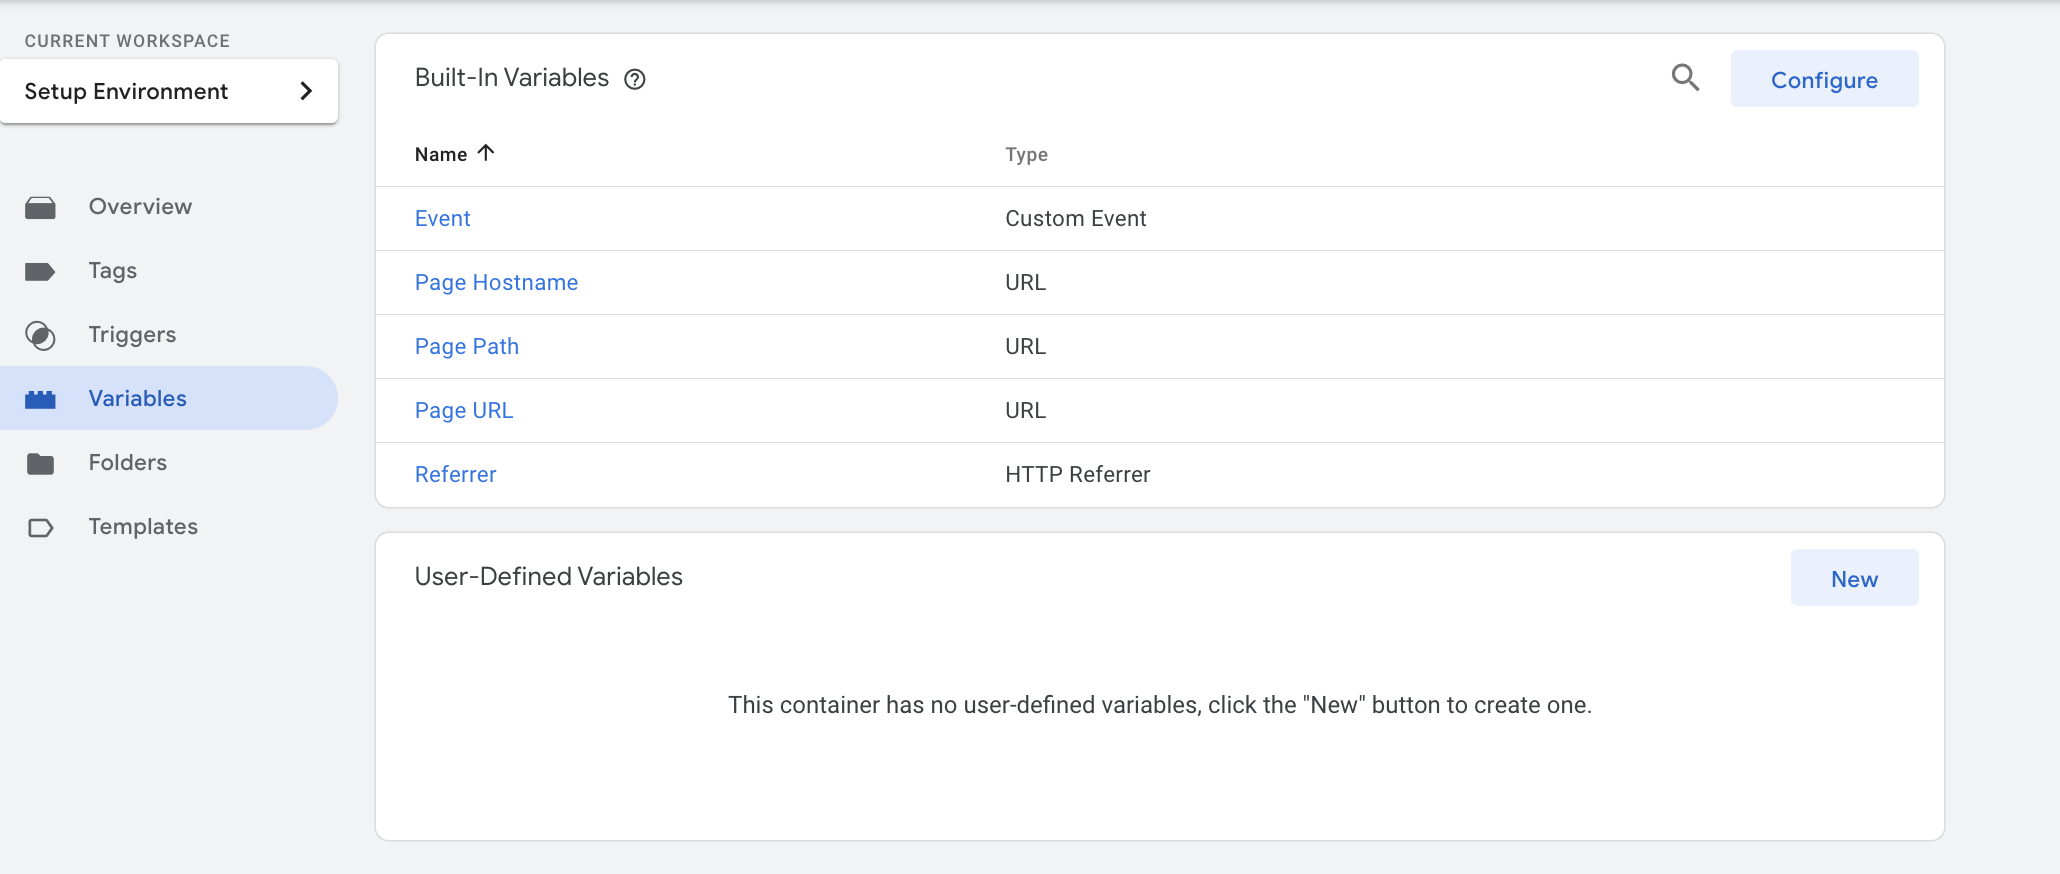
If you click configure, you’ll see that there are many more available variables. 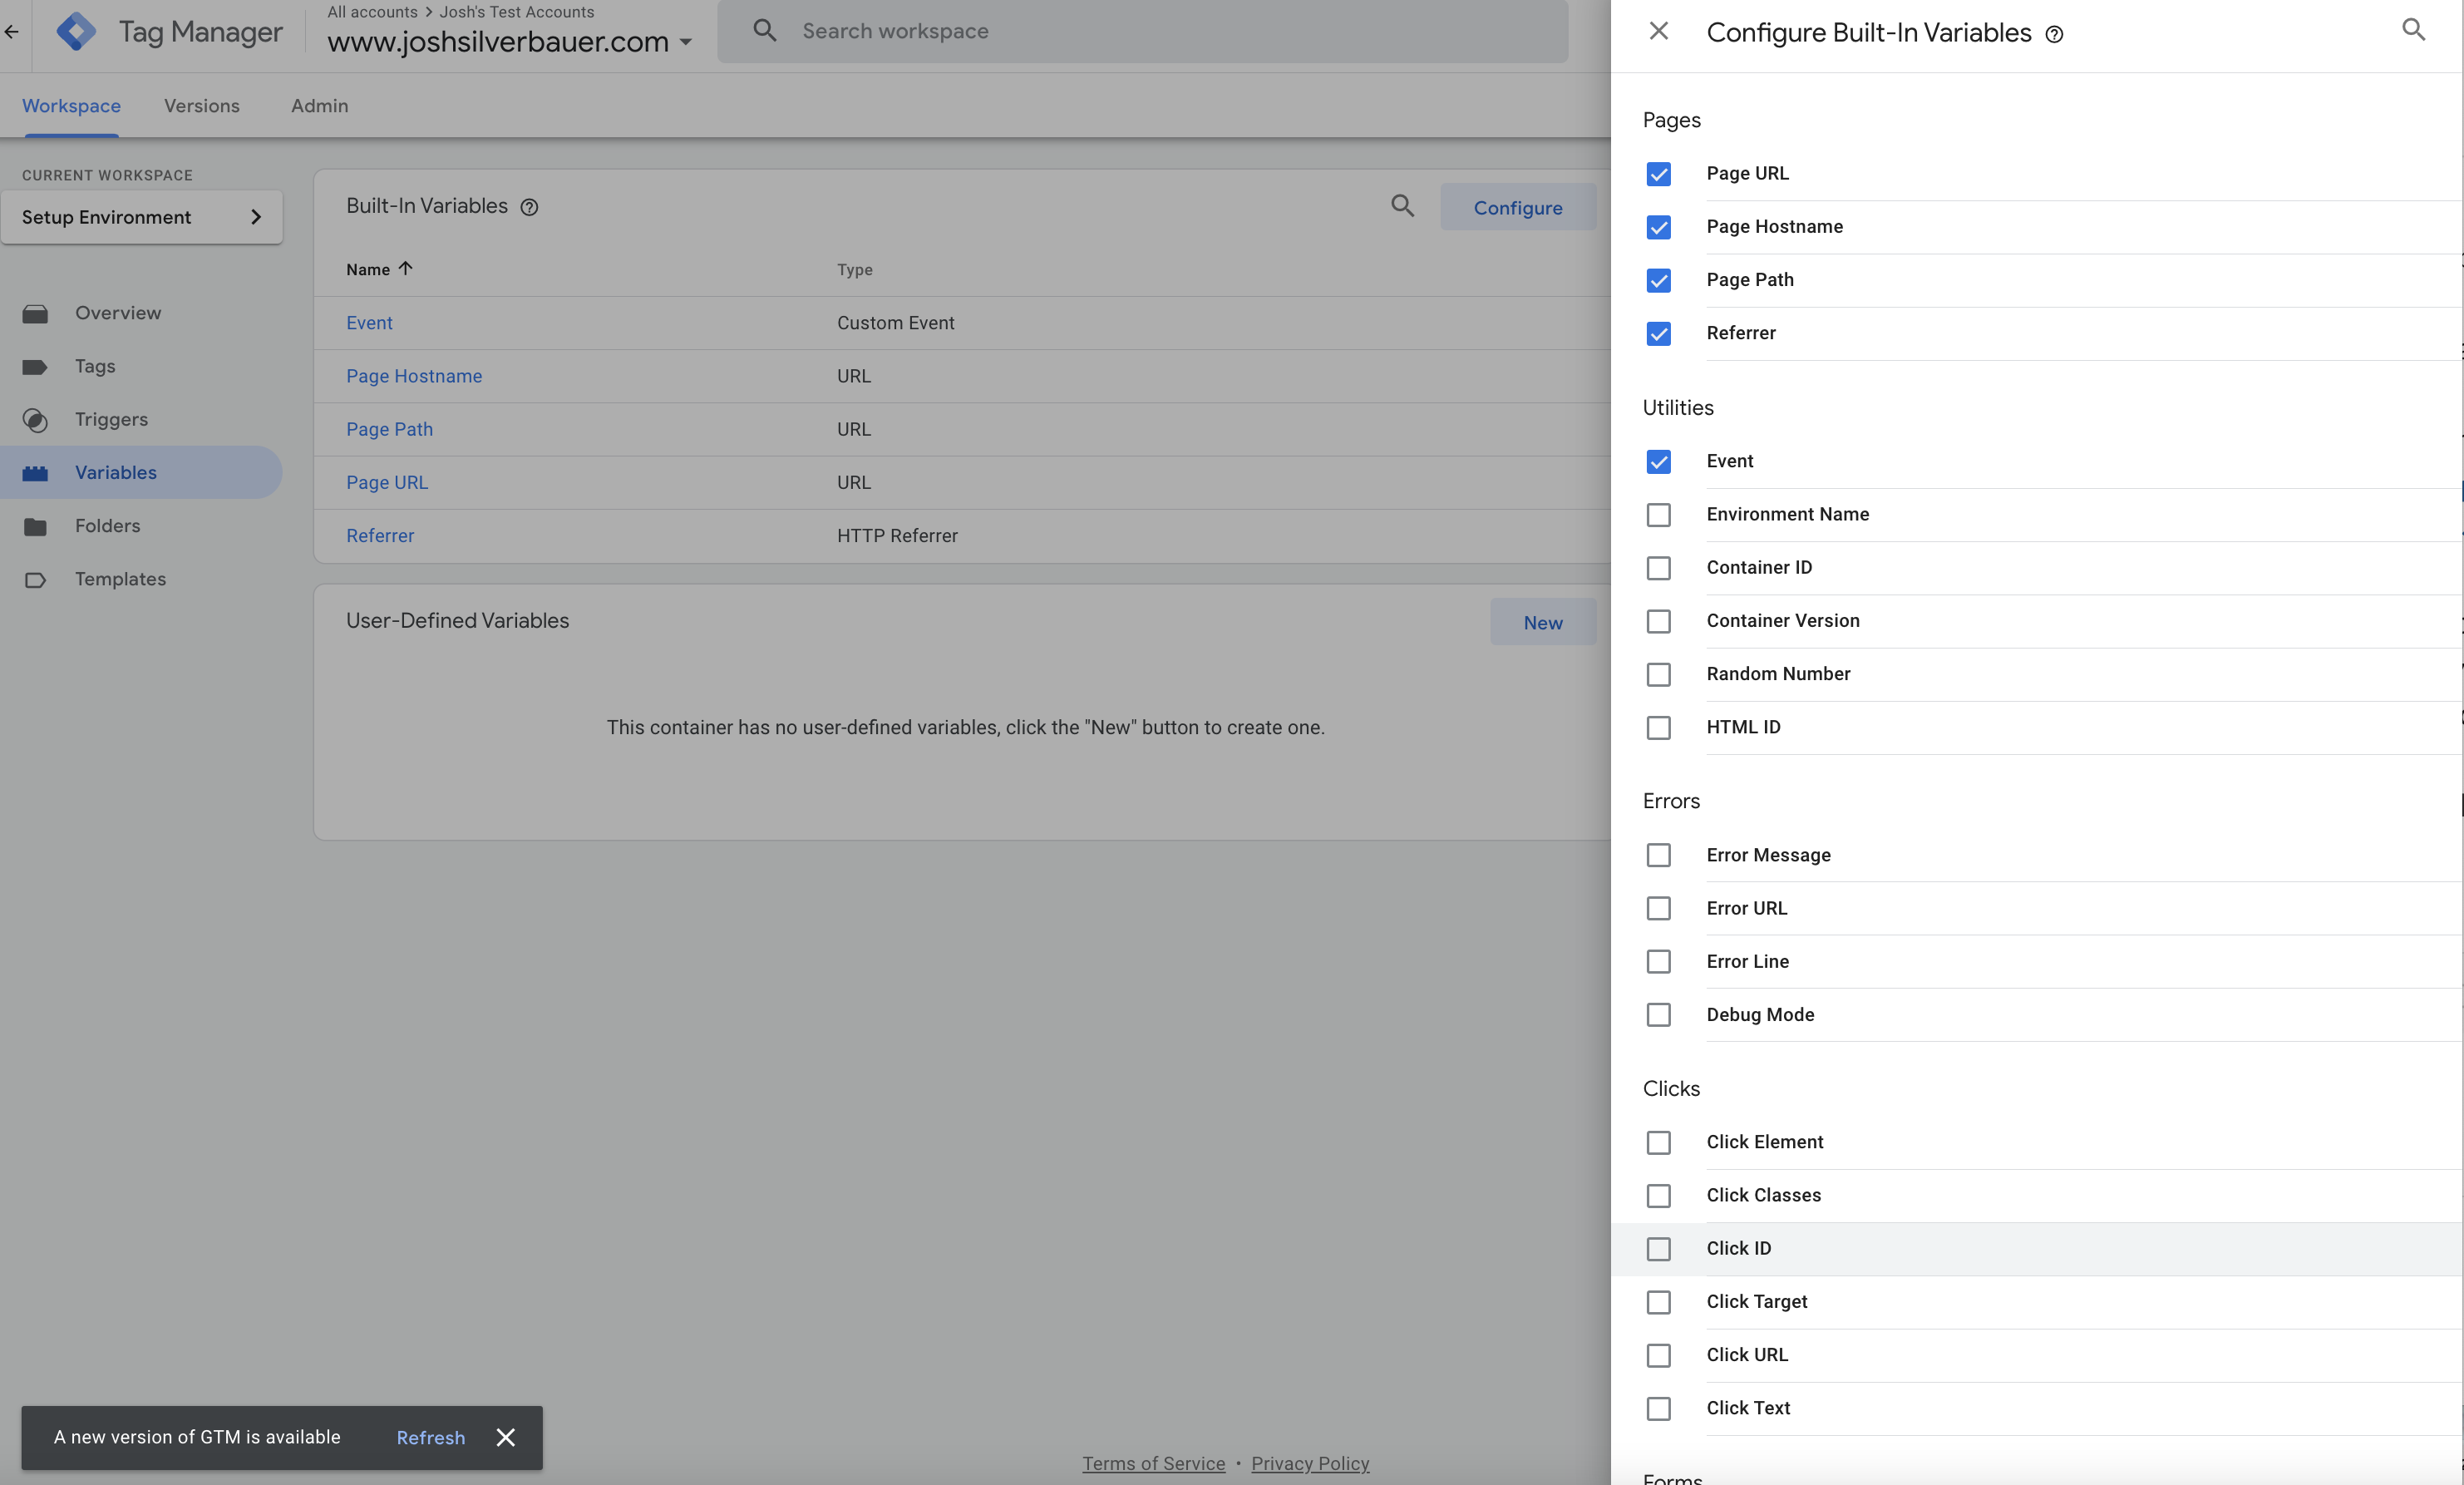
Generally, out of the box I select all of the click variables but you can really select whatever you’ll be tagging. Let’s take a look at a few:
Utilities:
Not super often used, these are mostly in relationship to GTM data. I often skip enabling these.
Errors:
Helpful if your trying to debug your website, returns javascript error messages. I often leave this unchecked but depending on your use-case this may be good to check.
Click:
Gives us information on click data on element clicks. These are the variables I use the most and I always enable them.
Forms:
Give us information on Form data on form submit event. These are usually duplicates of click data. I usually leave these disabled.
History:
Videos:
If you are interested in tracking YouTube videos, these variables hold information about the embedded youtube video on your page. I’ve found the YouTube trigger a little funky though and doesn’t always consistently work. Regardless, I usually enable these if there are YouTube videos on the site.
Scroll Tracking:
Element Visibility:
Setting up your catch-all triggers.
As mentioned before, you probably aren’t going to be super satisfied with just tracking pageviews. Most KPIs revolve around key actions on the site including clicks, purchases, form submits. This in mind, building global triggers will enable you to start receiving interaction data within your debugging/preview mode and help you identify how to build specific triggers for your key events.
First navigate to Triggers and select “New” 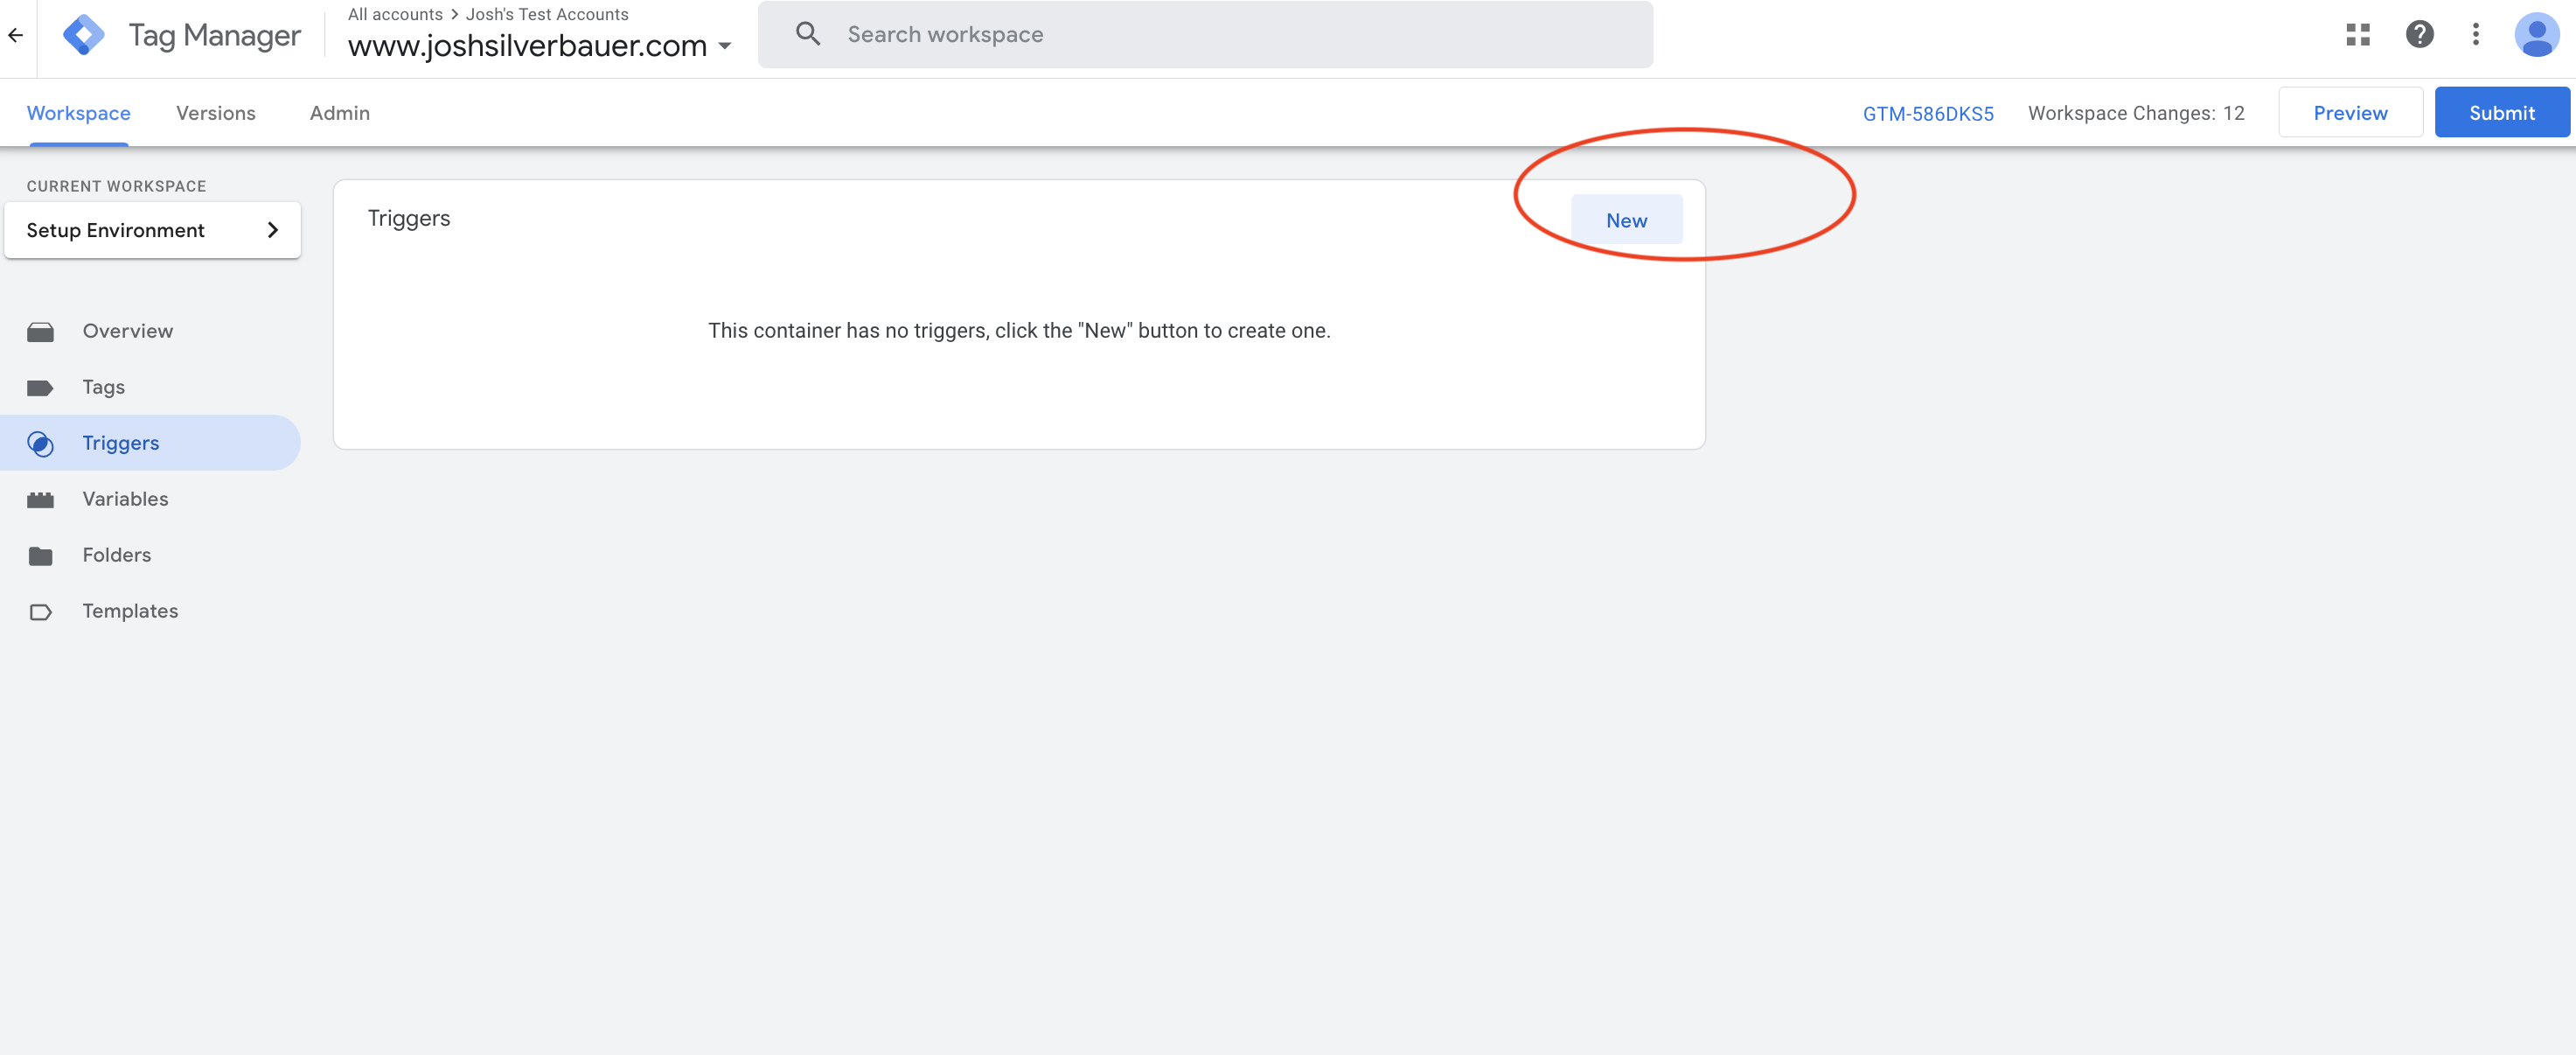
You will get a list of triggers that you can potentially choose from.
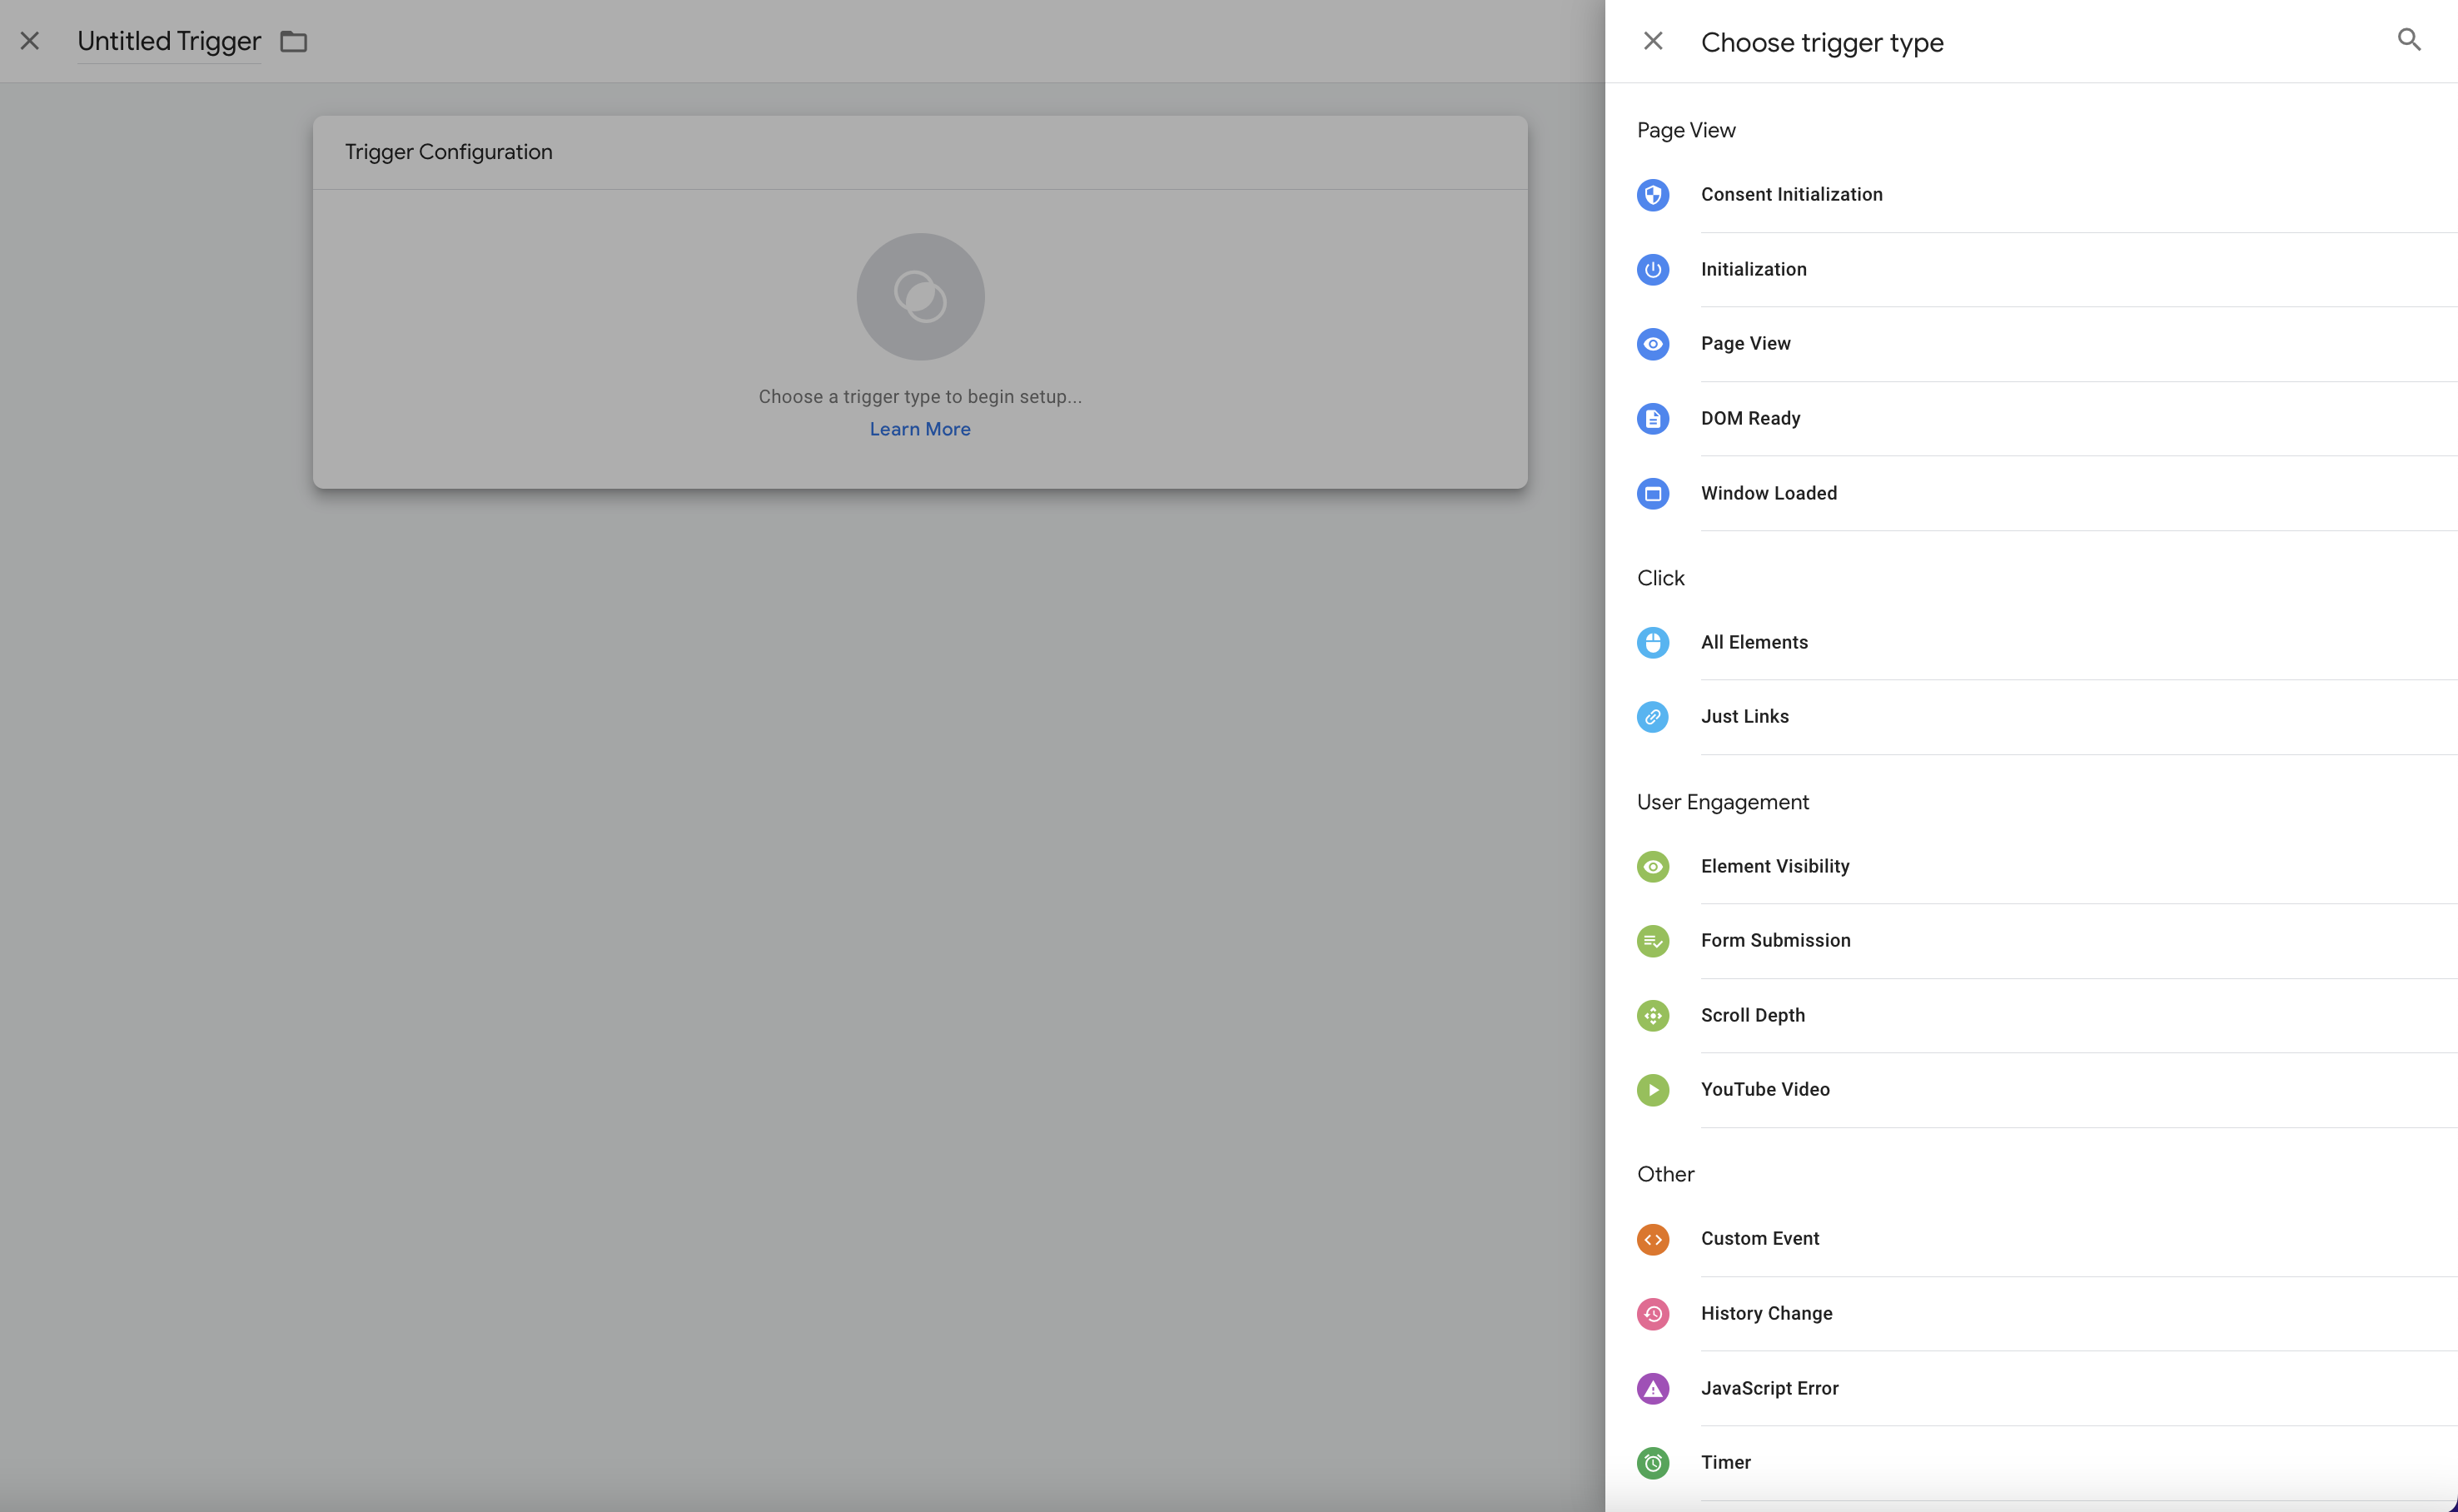
We will be focusing on the click trigger for now but the process is very similar for the rest of them. Generally, I build a catch-all trigger for both click elements (Just Links & All Elements), a Form Submission Trigger, Youtube Videos and History Changes. Catch-all page view triggers are already built into GTM so you don’t need to build those and the rest I enable when I have a specific need (otherwise you could make your debug mode very noisy).
So, let’s begin. We select our trigger “Click – All Elements” and set it to fire on All Clicks.
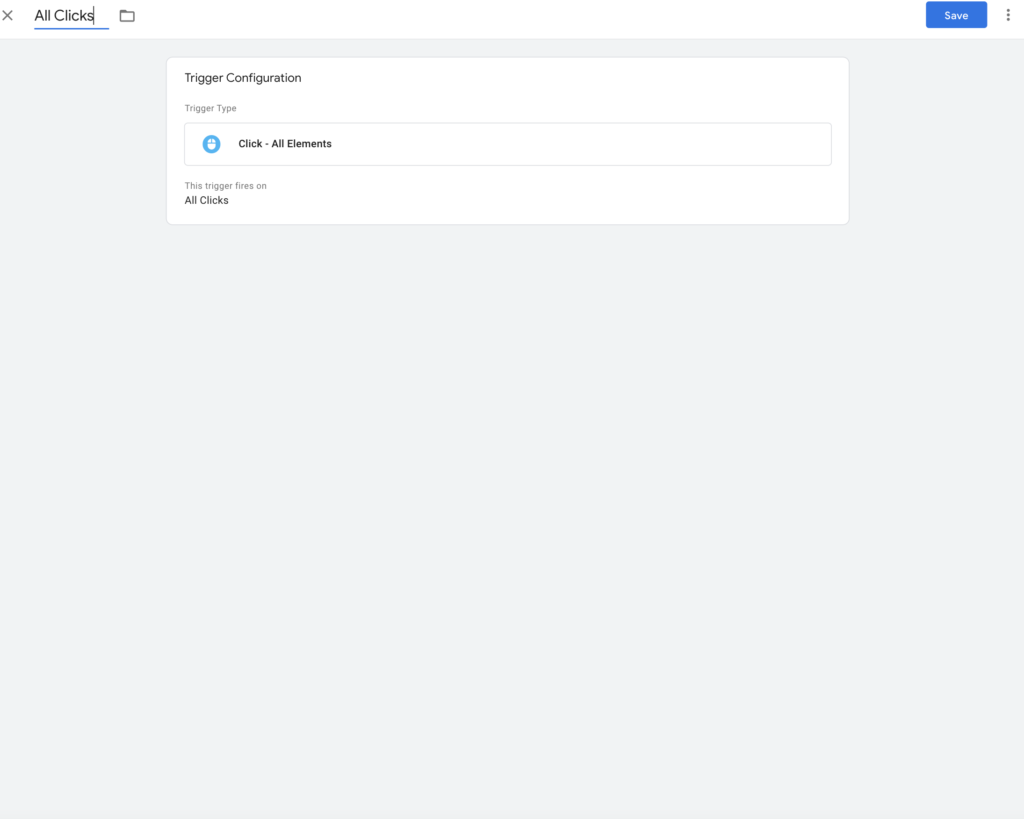
Since this is not attached to a specific tag, you won’t need to worry about it sending data to a third party platform. All we are doing is making all clicks available in our dataLayer and GTM preview mode which helps us inspect the elements as GTM sees them. This will be the basis of our event tagging.
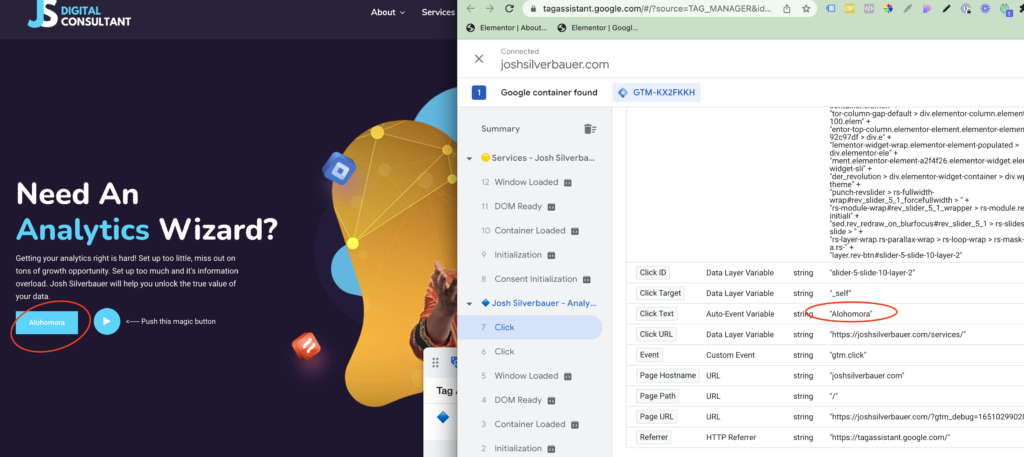
So, now i’ll go into my preview mode.
Type in your website and you’ll see your site connected to the Google Tag Manager debugger. Once you start clicking around you’ll notice that the GTM debugger is registering clicks now.
Let’s click on my CTA button. Once I clicked it, it sent a notice to GTM that a click had been registered and when I selected the click event and look at the variables, I can now see all of the information surrounding that click including the “click text”, “click class” and “click ID”.

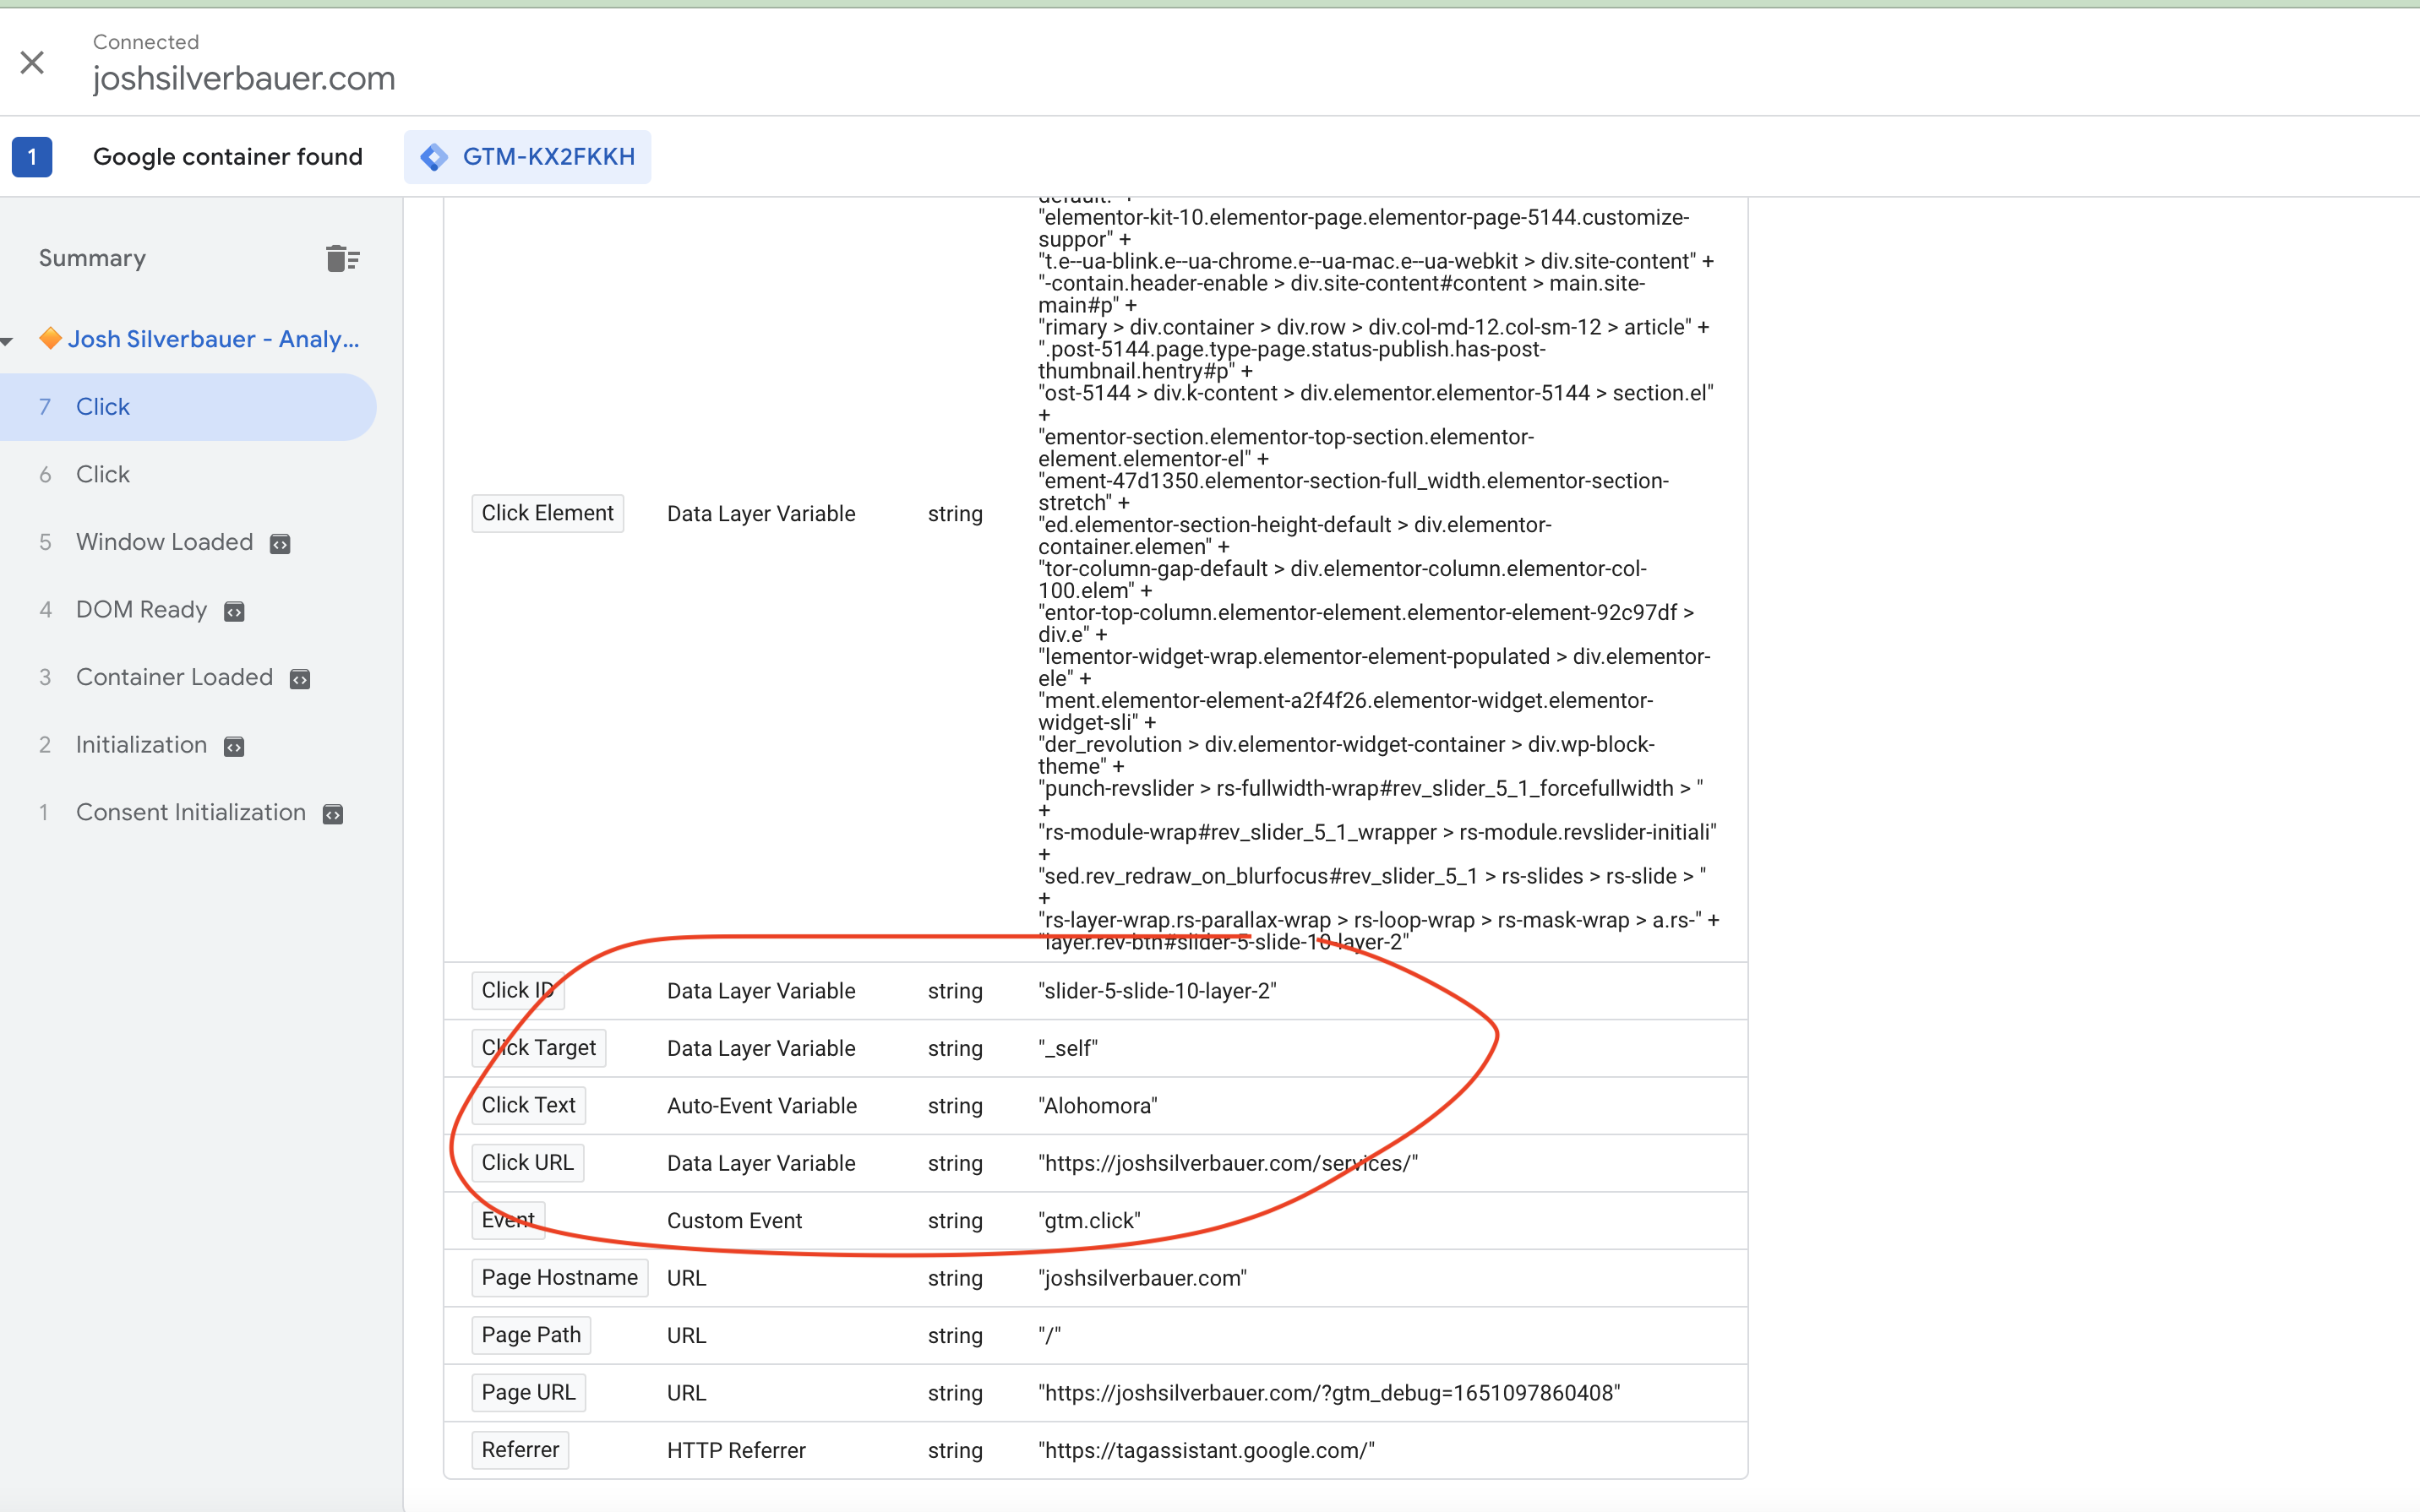
It’s important to note that just because something is coded with an ID or Class, it doesn’t necessarily mean that it’s how GTM registers it. That’s why it’s important to use preview mode to determine how GTM sees the element information and how to select certain criteria for your triggers.
Fly little birdie, fly
That’s it! That’s my ideal setup for a new tagging container. From here, I would start adventuring down the pathway of a measurement implementation. There is so much deeper we can go with GTM but a good start sets the foundation for the entire journey. Feel free to leave any questions below and can’t wait to see what YOU tag. Rock on!
Good article!